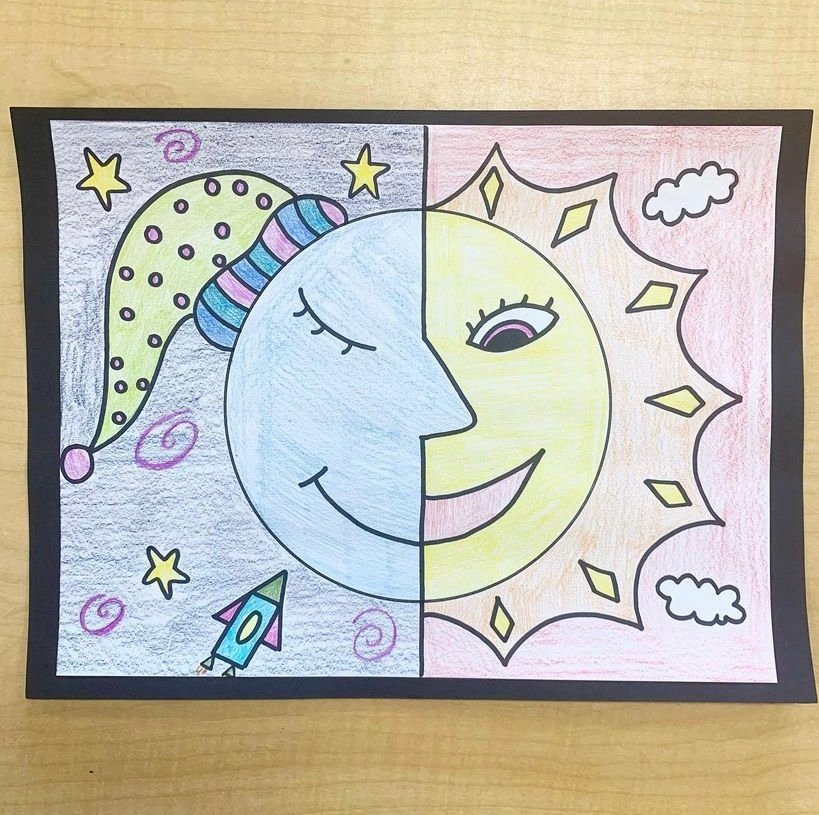
Warm Sun & Cool Moon Art Project
Shoutout, credit and thank you to Jasmine from First Grade Frenchies for sharing this project a few years ago on Instagram (@firstgradefrenchies). I thought it was awesome that it was a bit directed but a bit up to you. There are tons of warm/cool sun and moon projects out there but this one is specific to the way she did it. My kids really enjoyed the creativity that came from this.
Time needed: 30-40 minutes
Optional teacher prep: print a circle for students or make circle tracers.
Materials:
White paper (printer weight is fine)
Pencil
Eraser
Sharpie
Ruler
Pencil crayons, markers, crayons…whatever you want to use.
Optional - black construction paper & glue stick
Steps:
I chose to give my students paper with a circle on it already so that we wouldn’t end up with tiny little circles and they could focus on the creative elements. If you don’t have a circle for them, they’ll need to start by drawing one in the middle of their page.
Use a ruler to draw a vertical line through the centre of the circle.
Make a nose on either side.
On one side create a sun. It’s rays can be any shape you want, triangles, wavy etc.
Draw an open eye on the sun side and half a mouth (any shape).
Around the sun, draw sky elements (clouds, kites, birds etc.)
Now do the moon side. We made a little night cap for it and gave it a closed eye. Draw the other half of the mouth.
Around the moon, draw space elements (planets, rocket ships, swirls, stars etc.)
Trace all your pencil lines with the Sharpie and erase any leftover pencil marks.
Now colour in your project using warm colours on the sun side and cool colours on the moon side.
Optionally, glue your piece to black construction paper to frame it and make it pop.

Some other fun projects: